How to enable SSL in localhost XAMPP on macOS
If you are developing a web application that requires HTTPS connection, you may want to Enable SSL in localhost XAMPP server. SSL (Secure Sockets Layer) is a protocol that encrypts the data between the client and the server, ensuring that no one can intercept or tamper with it. In this blog post, I will show you how to set up SSL in localhost XAMPP macOS step by step. follow this step by step guide to Enable SSL in localhost
Step 1: Check XAMPP SSL config
Open /Applications/XAMPP/xamppfiles/etc/httpd.conf and make sure your settings are the same as below:
|
1 2 3 4 5 6 7 |
LoadModule socache_shmcb_module lib/httpd/modules/mod_socache_shmcb.so LoadModule ssl_module modules/mod_ssl.so <IfModule ssl_module> <IfDefine SSL> Include etc/extra/httpd-ssl.conf </IfDefine> </IfModule> |
Test SSL config with this command:
sudo /Applications/XAMPP/xamppfiles/xampp enablessl
Step 2: Backup httpd-ssl.conf
Go to: /Applications/XAMPP/xamppfiles/etc/extra
Copy httpd-ssl.conf & paste as httpd-ssl.conf.bak
Step 3: Edit httpd-ssl.conf
Open /Applications/XAMPP/xamppfiles/etc/extra/httpd-ssl.conf
Change default port from 8443 to 443
#Listen 8443
Listen 443
Find this line and remove everything below it
## SSL Virtual Host Context
Step 4: Create SSL folder to store SSL files
Open Terminal and run these commands:
cd /Applications/XAMPP/xamppfiles/etc/
mkdir ssl
cd ssl
Step 5: Create SSL CSR & private key
You can use any file name here (just replace localhost)
openssl req -new -newkey rsa:2048 -nodes -keyout localhost.key -out localhost.csr
Enter info as below. Note: change localhost to your localhost domain name (ex: www.domain.name)
|
1 2 3 4 5 6 7 |
Country Name (2 letter code) [AU]:VN State or Province Name (full name) [Some-State]:HCM Locality Name (eg, city) []:HCM Organization Name (eg, company) [Internet Widgits Pty Ltd]:VN Organizational Unit Name (eg, section) []:VN Common Name (e.g. server FQDN or YOUR name) []:localhost Email Address []:abc@gmail.com |
There are 2 more infos may be asked:
A challenge password
An optional company name
Leave these info BLANK (just Enter, no need input anything)
Step 6: Create .ext file
touch localhost.ext
Copy & paste below content to v3.ext file
Note: change localhost to your localhost domain name
|
1 2 3 4 5 6 7 |
authorityKeyIdentifier=keyid,issuer basicConstraints=CA:FALSE keyUsage = digitalSignature, nonRepudiation, keyEncipherment, dataEncipherment subjectAltName = @alt_names [alt_names] DNS.1 = localhost |
Step 7: Create SSL CRT
openssl x509 -req -sha256 -extfile localhost.ext -days 3650 -in localhost.csr -signkey localhost.key -out localhost.crt
Step 8: Add SSL CRT to macOS Keychain
Double click on localhost.crt on Finder
Select Keychain: System then click Add
Find & double click on localhost cert in Keychain Access
Expand Trust, select When using this certificates: Always Trust
Close the window and click Update Settings
Step 9: Config SSL in XAMPP virtual host
Open /Applications/XAMPP/xamppfiles/etc/extra/httpd-vhosts.conf
Update your config:
from
|
1 2 3 4 |
<VirtualHost *:80> ServerName localhost DocumentRoot "/Applications/XAMPP/xamppfiles/htdocs" </VirtualHost> |
to
|
1 2 3 4 5 6 7 |
<VirtualHost *:443> ServerName localhost DocumentRoot "/Applications/XAMPP/xamppfiles/htdocs" SSLEngine on SSLCertificateFile "/Applications/XAMPP/xamppfiles/etc/ssl/localhost.crt" SSLCertificateKeyFile "/Applications/XAMPP/xamppfiles/etc/ssl/localhost.key" </VirtualHost> |
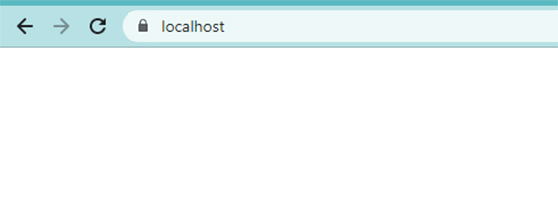
Step 10: Open Chrome and access https://localhost. Congratulation!
You have successfully enabled SSL in localhost XAMPP
Related Links: